Upgrade the Management Domain to VMware
Cloud Foundation 4.5.x
You must upgrade the management domain before upgrading VI workload domains in your
environment. In order to upgrade to
VMware Cloud Foundation
4.5.x, the management domain must be at VMware Cloud Foundation
4.2.1 or higher. If your
environment is at a version lower than 4.2.1, you must upgrade the management domain to
4.2.1 and then upgrade to 4.5.x. Upgrade the components in the management
domain in the following order:
- SDDC Manager andVMware Cloud Foundationservices.
- vRealize Suite Lifecycle Manager, vRealize Suite products, and Workspace ONE Access.
- NSX-T Data Center.
- vCenter Server.
- vSAN Witness host
- ESXi.
After all upgrades have completed
successfully:
- Remove the VM snapshots you took before starting the update.
- Take a backup of the newly installed components.
VMware Cloud Foundation Upgrade Prerequisites
Before you upgrade
VMware
Cloud Foundation
, make sure that the following prerequisites are met.- Take a backup of theSDDC Manager applianceusing an external SFTP server. See the "Backup and Restore of VMware Cloud Foundation" section in theVMware Cloud Foundation Administration Guide.
- Before you upgrade avCenter Server, take a file-based backup. See Manually Back Up vCenter Server.
- No domain operations are in progress. Domain operations include creating VI workload domains, expanding a workload domain (adding a cluster or host), and shrinking a workload domain (removing a cluster or host).
- Download the relevant bundles. See Downloading VMware Cloud Foundation Upgrade Bundles.If you downloaded the bundles manually, you must download all bundles for the target release and upload them to theSDDC Manager appliancebefore starting the upgrade.
- If you applied an async patch to your currentVMware Cloud Foundationinstance you must use theAsync Patch Toolto enable an upgrade to a later version ofVMware Cloud Foundation. For example, if you applied an asyncvCenter Serverpatch to aVMware Cloud Foundation4.3.1 instance, you must use theAsync Patch Toolto enable upgrade toVMware Cloud Foundation4.5.x. See Async Patch Tool.
- Make sure that there are no failed workflows in your system and none of theVMware Cloud Foundationresources are in activating or error state.If any of these conditions are true, contact VMware Support before starting the upgrade.
- Ensure that passwords for allVMware Cloud Foundationcomponents are valid.
- Review theRelease Notesfor known issues related to upgrades.
Perform Update Precheck
You must perform a precheck
before applying an update or upgrade bundle to ensure that your environment is ready for the
update.
For an ESXi
bundle, the system performs a bundle level precheck in addition to the environment
precheck. For VI workload domains using vSphere Lifecycle Manager baselines, the
ESXi bundle precheck validates the following.
- Custom ISO is compatible with your environment.
- Custom ISO size is smaller than the boot partition size.
- Third party VIBs are compatible with the environment.
If you silence a vSAN Skyline Health
alert in the 
vSphere Client
, SDDC
Manager
skips the related precheck and indicates which precheck it skipped. Click
Restore Precheck
to include the silenced precheck. For
example:You can also silence failed vSAN prechecks in the
SDDC Manager
UI
by clicking Silence
Precheck
. Silenced prechecks do not trigger warnings or block
upgrades. You
should only silence alerts if you know that they are incorrect. Do not silence
alerts for real issues that require remediation.
- In the navigation pane, click .
- On the Workload Domains page, click the workload domain where you want to run the precheck.
- On the domain summary page, click theUpdates/Patchestab. The image below is a sample screenshot and may not reflect the correct product versions.
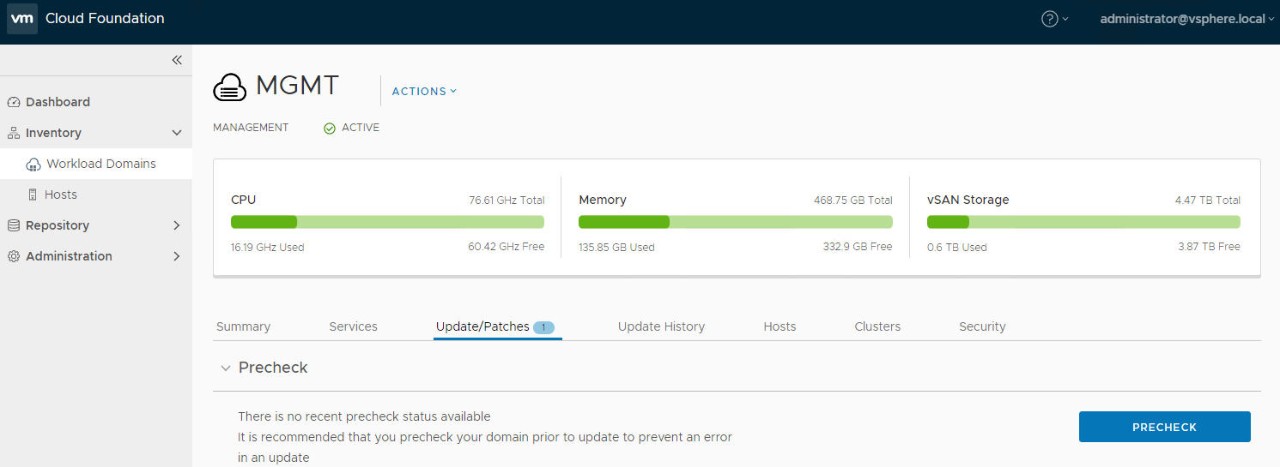
- ClickPrecheckto validate that the environment is ready to be upgraded.Once the precheck begins, a message appears indicating the time at which the precheck was started.

- ClickView Statusto see detailed tasks and their status. The image below is a sample screenshot and may not reflect the correct versions.

- To see details for a task, click the Expand arrow.If a precheck task failed, fix the issue, and clickRetry Precheckto run the task again. You can also clickPrecheck Failed Resourcesto retry all failed tasks.
- If ESXi hosts display a driver incompatibility issue when updating a VI workload domain using vSphere Lifecycle Manager baselines, perform the following steps:
- Identify the controller with the HCL issue.
- For the given controller, identify the supported driver and firmware versions on the source and target ESXi versions.
- Upgrade the firmware, if required.
- Upgrade the driver manually on the ESXi host and retry the task at which the upgrade failed.
- If the workload domain contains a host that includes pinned VMs, the precheck fails at the Enter Maintenance Mode step. If the host can enter maintenance mode through vCenter Server UI, you can suppress this check for NSX-T Data Center and ESXi in VMware Cloud Foundation by following the steps below.
- Log in to SDDC Manager by using a Secure Shell (SSH) client with the user name vcf and password you specified in the deployment parameter workbook.
- Open the/opt/vmware/vcf/lcm/lcm-app/conf/application-prod.propertiesfile.
- Add the following line to the end of the file:lcm.nsxt.suppress.dry.run.emm.check=truelcm.esx.suppress.dry.run.emm.check.failures=true
- RestartLifecycle Managementby typing the following command in the console window.systemctl restart lcm
- AfterLifecycle Managementis restarted, run the precheck again.
The precheck result is displayed at the
top of the Upgrade Precheck Details window. If you click
Exit
Details
, the precheck result is displayed at the top of the Precheck
section in the Updates/Patches tab. Ensure that the precheck results are
green before proceeding. A failed precheck may cause the update to fail.
Apply the VMware Cloud Foundation Upgrade Bundle
VMware Cloud Foundation
Upgrade BundleThe
VMware Cloud Foundation
Upgrade bundle
upgrades the SDDC Manager appliance and Lifecycle Management.- Download the VMware Cloud Foundation update bundle for your target release. See Downloading VMware Cloud Foundation Upgrade Bundles.
- Ensure you have a recent successful backup of SDDC Manager using an external SFTP server.
- Ensure you have taken a snapshot of the SDDC Manager appliance.
- Ensure you have recent successful backups of the components managed by SDDC Manager.
- In the navigation pane, click .
- On the Workload Domains page, click the management domain and then click theUpdates/Patchestab.
- ClickPrecheckto run the upgrade precheck.Resolve any issues before proceeding with the upgrade.
- In theAvailable Updatessection, select the target release.
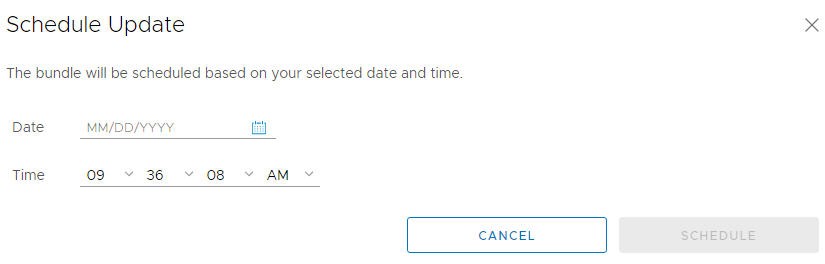
- ClickUpdate NoworSchedule Updatenext to the VMware Cloud Foundation Upgrade bundle.
- If you selectedSchedule Update, select the date and time for the bundle to be applied and clickSchedule.
 If you clickedUpdate Now, theVMware Cloud FoundationUpdate Status window displays the components that will be upgraded and the upgrade status. ClickView Update Activityto view the detailed tasks. After the upgrade is completed, a green bar with a check mark is displayed.
 - ClickFinish.
Apply the VMware Cloud Foundation
Configuration Drift Bundle
The configuration drift bundle
applies configuration changes required for 2nd party software components in the
VMware Cloud Foundation
Bill of Materials for the target
release. Configuration changes are applied to the management domain and may also affect VI
workload domains in your environment. However, there is no downtime on VI workload domains
and they need not be in a maintenance window. - Download the configuration drift bundle for your target release. See Downloading VMware Cloud Foundation Upgrade Bundles.
- Ensure that you have a recent successful backup of SDDC Manager using an external SFTP server.
- Ensure that you have taken a snapshot of the SDDC Manager appliance.
- Ensure that you have recent successful backups of the components managed by SDDC Manager.
- In the navigation pane, click .
- On the Workload Domains page, click the management domain and then click theUpdates/Patchestab.
- ClickPrecheckto run the upgrade precheck.Resolve any issues before proceeding with the upgrade.
- In the Available Updates section, select the target release.
- ClickUpdate NoworSchedule Updatenext to the VMware Cloud Foundation Configuration drift bundle.
- If you selectedSchedule Update, select the date and time for the bundle to be applied and then clickSchedule.After the upgrade is completed, a green bar with a check mark is displayed.
- ClickFinish.
Upgrade vRealize Suite Lifecycle Manager for VMware Cloud Foundation
The process for upgrading
vRealize Suite Lifecycle Manager
depends on your current version of VMware
Cloud Foundation
and vRealize Suite Lifecycle Manager
. - Ensure that you have a recent successful backup of thevRealize Suite Lifecycle Managerappliance.
- Download the VMware Software Update bundle(s) forvRealize Suite Lifecycle Manager. See Downloading VMware Cloud Foundation Upgrade Bundles.You may have to download and apply multiple bundles, depending on the current product versions in your environment. If your environment is usingVMware Cloud Foundation4.4 or later andvRealize Suite Lifecycle Manager8.6.2 and later, you do not need to download any bundles, since all upgrades are performed from thevRealize Suite Lifecycle ManagerUI.
- If FIPS Mode Compliance is enabled invRealize Suite Lifecycle Manager, you must manually turn it off on thevRealize Suite Lifecycle ManagerUI. You can re-enable FIPS Mode Compliance after the upgrade.
VMware recently renamed the vRealize Suite of products to VMware Aria Suite. See the Aria Naming Updates blog post for more details. During the
VMware
Cloud Foundation
4.5.x upgrade process, you can upgrade directly to VMware Aria Suite Lifecycle 8.12 or higher, as long as the path is supported. See the VMware Interoperability Matrix for more information. Even after upgrading all vRealize Suite components to VMware Aria, the SDDC Manager
UI
will display the old vRealize names.VMware
Cloud Foundation
4.4 and vRealize Suite Lifecycle Manager
8.6.2, upgrade and deployment of the vRealize Suite products is managed by vRealize Suite Lifecycle Manager
. You can upgrade vRealize Suite products as new versions become available in your vRealize Suite Lifecycle Manager
. vRealize Suite Lifecycle Manager
will only allow upgrades to compatible and supported versions of vRealize Suite products.
If you already have
vRealize Suite Lifecycle Manager
8.6.2, you can upgrade vRealize Suite Lifecycle Manager
to a supported version using the vRealize Suite Lifecycle Manager
UI.
See the VMware Interoperability Matrix for information about which versions are supported with your version of
VMware
Cloud Foundation
and KB 88829 for more information about supported upgrade paths using vRealize Suite Lifecycle Manager
.VMware
Cloud Foundation
may require a vRealize Suite Lifecycle Manager
Product Support Pack. Check the release notes to see what Product Support Pack is required for your versions of vRealize Suite Lifecycle Manager
and VMware
Cloud Foundation
:If you have an earlier version of
vRealize Suite Lifecycle Manager
, use the process below to upgrade to vRealize Suite Lifecycle Manager
8.6.2 and then use the vRealize Suite Lifecycle Manager
UI to upgrade to later supported versions.The
VMware
Cloud Foundation
4.5.x BOM requires vRealize Suite Lifecycle Manager
8.8.2 or higher.- In the navigation pane, click .
- On the Workload Domain page, click the management domain.
- On the Domain Summary page, click theUpdates/Patchestab.
- ClickPrecheckto run the upgrade precheck.Resolve any issues before proceeding with the upgrade.
- In the Available Updates section, select the target release.
- ClickUpdate NoworSchedule Updatenext to the vRealize Suite Lifecycle Manager upgrade bundle.
- If you selectedSchedule Update, click the date and time for the bundle to be applied.
- Monitor the upgrade progress. See Monitor VMware Cloud Foundation Updates.If the upgrade fails, you can revert to the snapshot created by the upgrade workflow. After you resolve the issue, you can retry the upgrade.WhenvRealize Suite Lifecycle Manageris upgraded successfully, a message with a green background and check mark is displayed.
- ClickExit Status.
Upgrade vRealize Suite Products for VMware
Cloud Foundation
If you had
vRealize Log Insight
, vRealize
Automation
,
vRealize Operations
, or
Workspace
ONE Access
in your pre-upgrade
environment, you must upgrade them from vRealize Suite Lifecycle Manager
.Upgrade to
vRealize Suite Lifecycle Manager
8.6.2 or later.VMware recently renamed the vRealize
Suite of products to VMware Aria Suite. See the Aria Naming Updates blog post for more details. Even after upgrading all
vRealize Suite components to VMware Aria, the
SDDC Manager
UI
will display the old vRealize names.vRealize Suite Lifecycle Manager
to:- Download upgrade binaries
- Create snapshots of the virtual appliances
- Run pre-upgrade checks
- Upgrade vRealize Suite products
- Log in tovRealize Suite Lifecycle Managerathttps://as the administrator.<vrealize_suite_lifecycle_manager_fqdn>
- Upgrade vRealize Suite products.See “Upgrading vRealize Suite Lifecycle Manager and vRealize Suite Products” in thevRealize Suite Lifecycle Manager Installation, Upgrade, and Management Guidefor your current version ofvRealize Suite Lifecycle Manager.
Upgrade NSX-T Data Center for VMware Cloud
Foundation
Upgrade NSX-T Data Center in the management domain before you upgrade VI workload
domains.
All applicable NSX-T Data Center updates must have been applied to all workload
domains for the NSX-T Data Center upgrade bundle to be available for download.
Otherwise, the status of the NSX-T Data Center bundle is displayed as Pending
instead of Available for all workload domains.
- Validate that the NSX Manager password is valid.
- Download the upgrade bundle for NSX-T Data Center. See Downloading VMware Cloud Foundation Upgrade Bundles.
- Back up the NSX-T Data Center configuration and download the technical support logs.
- Ensure that the appropriate communication ports are open between the NSX Edge nodes and NSX Manager. For more information on ports, see https://ports.esp.vmware.com/home/NSX.
- Review Operational Impacts of NSX-T Data Center Upgrade inNSX Upgrade Guideto understand the impact that each component upgrade might have on your environment.
- Ensure there are no active alarms on hosts or vSphere clusters using the vSphere Client.
- Customers upgrading to NSX-T 3.2.1.2 are strongly encouraged to run the NSX Upgrade Evaluation Tool before starting the upgrade process. The tool is designed to ensure success by checking the health and readiness of your NSX Managers prior to upgrading.
Upgrading NSX-T Data Center involves the
following components:
- Upgrade Coordinator
- NSX Edge clusters (if deployed)
- NSX Edge
- Host clusters
- NSX Manager cluster
VI workload domains can share the same
NSX Manager cluster and NSX Edge clusters. When you upgrade these components for one
VI workload domain, they are upgraded for all VI workload domains that share the
same NSX Manager or NSX Edge cluster. You cannot perform any operations on the VI
workload domains while NSX-T is being upgraded.
The upgrade wizard provides some
flexibility when upgrading NSX-T Data Center for workload domains. By default, the
process upgrades all NSX Edge clusters in parallel, and then all host clusters in
parallel. Parallel upgrades reduce the overall time required to upgrade your
environment. You can also choose to upgrade NSX Edge clusters and host clusters
sequentially. The ability to select clusters allows for multiple upgrade windows and
does not require all clusters to be available at a given time.
The NSX Manager cluster is
upgraded only if the
Upgrade all host clusters
setting is
enabled on the Host Clusters tab. NSX Manager is upgraded after all host
clusters in the workload domain are upgraded. New features introduced in the
upgrade are not configurable until the NSX Manager cluster is
upgraded.- In the navigation pane, click .
- On the Workload Domains page, click the domain you are upgrading and then click theUpdates/Patchestab.When you upgrade NSX-T components for a selected VI workload domain, those components are upgraded for all VI workload domains that share the NSX Manager cluster.
- ClickPrecheckto run the upgrade precheck.Resolve any issues before proceeding with the upgrade.The NSX-T precheck runs on all VI workload domains in your environment that share the NSX Manager cluster.
- In the Available Updates section, select the target release.
- ClickUpdate NoworSchedule Updatenext to the VMware Software NSX-T bundle.
- On the NSX-T Edge Cluster page, select the NSX Edge clusters you want to upgrade and click Next.By default, all NSX Edge clusters are upgraded. To select specific NSX Edge clusters, select theUpgrade NSX-T edge clusters onlycheckbox and select theEnable edge selectionoption. Then select the NSX Edges you want to upgrade.
- ClickNext.
- By default, all vSphere clusters across all workload domains are upgraded. If you want to select specific vSphere clusters to be upgraded, turn off theUpgrade all host clusterssetting. Host clusters are upgraded after all Edge clusters have been upgraded.The NSX-T Manager cluster is upgraded only if theUpgrade all host clusterssetting is enabled.
- If you have a single cluster in your environment, enable theUpgrade all host clusterssetting.
- If you have multiple host clusters and choose to upgrade only some of them, you must go through the NSX-T upgrade wizard again until all host clusters have been upgraded. When selecting the final set of clusters to be upgraded, you must enable theUpgrade all host clusterssetting so that NSX-T Manager is upgraded.
- If you have upgraded all host clusters without enabling theUpgrade all host clusterssetting, run through the NSX-T upgrade wizard again and schedule the upgrade to upgrade NSX-T Manager.
- ClickNext.
- On the Upgrade Options dialog, select the upgrade optimizations and clickNext.By default, Edge clusters and host clusters are upgraded in parallel. You can enable sequential upgrade by selecting the relevant checkbox.
- If you selected theSchedule Upgradeoption, specify the date and time for the NSX-T Data Center bundle to be applied.
- ClickNext.
- On the Review page, review your settings and clickFinish.The NSX-T Data Center upgrade begins and the upgrade components are displayed. The upgrade view displayed here pertains to the workload domain where you applied the bundle. Click the link to the associated workload domains to see the components pertaining to those workload domains.
- Monitor the upgrade progress. See Monitor VMware Cloud Foundation Updates.If a component upgrade fails, the failure is displayed across all associated workload domains. Resolve the issue and retry the failed task.
When all NSX-T Data Center workload
components are upgraded successfully, a message with a green background and check
mark is displayed.
Upgrade NSX-T Data Center for VMware Cloud
Foundation in a Federated Environment
When NSX Federation is configured between two
VMware
Cloud Foundation
instances, SDDC
Manager
does not manage the lifecycle of the NSX Global Managers. To upgrade the
NSX Global Managers, you must first follow the standard lifecycle of each VMware
Cloud Foundation
instance using SDDC
Manager
, and then manually upgrade the NSX Global
Managers for each instance.Download NSX Global Manager Upgrade
Bundle
SDDC
Manager
does not manage the lifecycle
of the NSX Global Managers. You must download the NSX-T Data Center upgrade bundle manually to
upgrade the NSX Global Managers.- In a web browser, go to VMware Customer Connect and browse to the download page for the version of NSX-T Data Center listed in theVMware Cloud FoundationRelease Notes BOM.
- Locate theNSXand clickversionUpgrade BundleRead More.
- Verify that the upgrade bundle filename extension ends with.mub.The upgrade bundle filename has the following formatVMware-NSX-upgrade-bundle-.versionnumber.buildnumber.mub
- ClickDownload Nowto download the upgrade bundle to the system where you access the NSX Global Manager UI.
Upgrade the Upgrade Coordinator for NSX Federation
The upgrade coordinator runs in the NSX Manager. It is a self-contained web application
that orchestrates the upgrade process of hosts, NSX Edge cluster, NSX Controller cluster,
and the management plane.
The upgrade coordinator guides you through the
upgrade sequence. You can track the upgrade process and, if necessary, you can pause
and resume the upgrade process from the UI.
- In a web browser, log in to Global Manager for the domain at https://nsxt_gm_vip_fqdn/).
- Select from the navigation panel.
- ClickProceed to Upgrade.
- Navigate to the upgrade bundle .mub file you downloaded or paste the download URL link.
- ClickBrowseto navigate to the location you downloaded the upgrade bundle file.
- Paste the VMware download portal URL where the upgrade bundle .mub file is located.
- ClickUpload.When the file is uploaded, theBegin Upgradebutton appears.
- ClickBegin Upgradeto upgrade the upgrade coordinator.Upgrade one upgrade coordinator at a time.
- Read and accept the EULA terms and accept the notification to upgrade the upgrade coordinator..
- ClickRun Pre-Checksto verify that all NSX-T Data Center components are ready for upgrade.The pre-check checks for component connectivity, version compatibility, and component status.
- Resolve any warning notifications to avoid problems during the upgrade.
Upgrade NSX Global Managers for VMware Cloud Foundation
Manually upgrade the NSX Global Managers when NSX Federation is configured between two
VMware
Cloud Foundation
instances.You can upgrade NSX Local Managers either before or after the NSX Global Managers, using
SDDC
Manager
.- In a web browser, log in to Global Manager for the domain at https://nsxt_gm_vip_fqdn/).
- SelectSystem>Upgradefrom the navigation panel.
- ClickStartto upgrade the management plane and then clickAccept.
- On the Select Upgrade Plan page, selectPlan Your Upgradeand clickNext.The NSX Manager UI, API, and CLI are not accessible until the upgrade finishes and the management plane is restarted.
Upgrade vCenter Server for VMware Cloud Foundation
The upgrade bundle for VMware vCenter Server is used to upgrade the vCenter Servers managed by SDDC Manager. Upgrade vCenter Server in the management domain before upgrading vCenter Server in VI workload domains.
- Download the VMware vCenter Server upgrade bundle. See Downloading VMware Cloud Foundation Upgrade Bundles.
- Take a file-based backup of the vCenter Server appliance before starting the upgrade. See Manually Back Up vCenter Server.After taking a backup, do not make any changes to the vCenter Server inventory or settings until the upgrade completes successfully.
- If your workload domain contains Workload Management (vSphere with Tanzu) enabled clusters, the supported target release depends on the version of Kubernetes (K8s) currently running in the cluster. Older versions of K8s may require a specific upgrade sequence. See KB 88962 for more information.
Parallel upgrades of vCenter Server are not supported. The vCenter Server instance for each workload domain must be upgraded separately.
- In the navigation pane, click .
- On the Workload Domains page, click the domain you are upgrading and then click theUpdates/Patchestab.
- ClickPrecheckto run the upgrade precheck.Resolve any issues before proceeding with the upgrade.
- In the Available Updates section, select the target release.
- ClickUpdate NoworSchedule Updatenext to the vCenter upgrade bundle.
- If you selectedSchedule Update, click the date and time for the bundle to be applied and clickSchedule.
- Monitor the upgrade progress. See Monitor VMware Cloud Foundation Updates.If the upgrade fails, resolve the issue and retry the failed task. If you cannot resolve the issue, restore vCenter Server using the file-based backup. SeeRestore vCenter Server.
Once the upgrade successfully completes, use the vSphere Client to change the vSphere DRS Automation Level setting back to the original value (before you took a file-based backup) for each vSphere cluster that is managed by the vCenter Server. See KB 87631 for information about using VMware PowerCLI to change the vSphere DRS Automation Level.
Upgrade vSAN Witness Host for VMware Cloud
Foundation
If your
VMware
Cloud Foundation
environment contains stretched clusters, update and remediate the vSAN witness
host.Download the ESXi ISO that matches the version listed in the the Bill of Materials
(BOM) section of the
VMware Cloud Foundation Release Notes
.- In a web browser, log in to vCenter Server at https://vcenter_server_fqdn/ui.
- Upload the ESXi ISO image file to vSphere Lifecycle Manager.
- Click .
- Click theImported ISOstab.
- ClickImport ISOand then clickBrowse.
- Navigate to the ESXi ISO file you downloaded and clickOpen.
- After the file is imported, clickClose.
- Create a baseline for the ESXi image.
- On the Imported ISOs tab, select the ISO file that you imported, and clickNew baseline.
- Enter a name for the baseline and specify theContent Typeas Upgrade.
- ClickNext.
- Select the ISO file you had imported and clickNext.
- Review the details and clickFinish.
- Attach the baseline to the vSAN witness host.
- Click .
- In the Inventory panel, click .
- Select the vSAN witness host and click theUpdatestab.
- Under Attached Baselines, click .
- Select the baseline that you had created in step 3 and clickAttach.
- ClickCheck Compliance.After the compliance check is completed, theStatuscolumn for the baseline is displayed as Non-Compliant.
- Remediate the vSAN witness host and update the ESXi hosts that it contains.
- Right-click the vSAN witness and click .
- ClickOK.
- Click theUpdatestab.
- Select the baseline that you had created in step 3 and clickRemediate.
- In the End user license agreement dialog box, select the check box and clickOK.
- In the Remediate dialog box, select the vSAN witness host, and clickRemediate.The remediation process might take several minutes. After the remediation is completed, theStatuscolumn for the baseline is displayed as Compliant.
- Right-click the vSAN witness host and click .
- ClickOK.
Upgrade ESXi with vSphere Lifecycle Manager Baselines for VMware Cloud Foundation
The management domain uses vSphere Lifecycle Manager baselines for ESXi host upgrades. VI workload domains can use vSphere Lifecycle Manager baselines or vSphere Lifecycle Manager images. The following procedure describes upgrading ESXi hosts in workload domains that use vSphere Lifecycle Manager baselines.
- Validate that the ESXi passwords are valid.
- Download the ESXi bundle. See Downloading VMware Cloud Foundation Upgrade Bundles.
- Ensure that the domain for which you want to perform cluster-level upgrade does not have any hosts or clusters in an error state. Resolve the error state or remove the hosts and clusters with errors before proceeding.
For information about upgrading ESXi in VI workload domains that use vSphere Lifecycle Manager images, see Upgrade ESXi with vSphere Lifecycle Manager Images for VMware Cloud Foundation.
By default, the upgrade process upgrades the ESXi hosts in all clusters in a workload domain in parallel. If you have multiple clusters in the management domain or in a VI workload domain, you can select the clusters to upgrade.
If you want to skip any hosts while applying an ESXi update to the management domain or a VI workload domain, you must add these hosts to the
application-prod.properties
file before you begin the update. See "Skip Hosts During ESXi Update".To perform ESXi upgrades with custom ISO images or async drivers see "Upgrade ESXi with Custom ISOs" and "Upgrade ESXi with Stock ISO and Async Drivers".
If you are using external (non-vSAN) storage, the following procedure updates the ESXi hosts attached to the external storage. However, updating and patching the storage software and drivers is a manual task and falls outside of SDDC Manager lifecycle management. To ensure supportability after an ESXi upgrade, consult the vSphere HCL and your storage vendor.
- Navigate to theUpdates/Patchestab of the workload domain.
- ClickPrecheckto run the upgrade precheck.Resolve any issues before proceeding with the upgrade.
- In the Available Updates section, select the target release.
- ClickUpgrade NoworSchedule Update.
- If you selectedSchedule Update, specify the date and time for the bundle to be applied.
- Select the clusters to upgrade and clickNext.The default setting is to upgrade all clusters. To upgrade specific clusters, clickEnable cluster-level selectionand select the clusters to upgrade.
- ClickNext.
- Select the appropriate upgrade options and clickFinish.By default, the selected clusters are upgraded in parallel. If you selected more than five clusters to be upgraded, the first five are upgraded in parallel and the remaining clusters are upgraded sequentially. To upgrade all selected clusters sequentially, selectEnable sequential cluster upgrade.ClickEnable Quick Bootif desired. Quick Boot for ESXi hosts is an option that allows Update Manager to reduce the upgrade time by skipping the physical reboot of the host.
- Monitor the upgrade progress. See Monitor VMware Cloud Foundation Updates.
Upgrade the vSAN Disk Format for vSAN clusters. The disk format upgrade is optional. Your vSAN cluster continues to run smoothly if you use a previous disk format version. For best results, upgrade the objects to use the latest on-disk format. The latest on-disk format provides the complete feature set of vSAN. See Upgrading vSAN Disk Format Using vSphere Client.
Skip Hosts During ESXi
Update
You can skip hosts while applying an
ESXi update to the management domain or a VI workload domain. The skipped hosts are not
updated.
You cannot skip hosts that are part of
a VI workload domain that is using vSphere Lifecycle Manager images, since these hosts
are updated at the cluster-level and not the host-level.
- Using SSH, log in to theSDDC Manager appliancewith the user namevcfand password you specified in the deployment parameter sheet.
- Typesuto switch to the root account.
- Retrieve the host IDs for the hosts you want to skip.curl 'https://SDDC_MANAGER_IP/v1/hosts' -i -u 'username:password' -X GET -H 'Accept: application/json' |json_ppReplace the SDDC Manager IP address, user name, and password with the information for your environment.
- Copy the ids for the hosts you want to skip from the output. For example:... "fqdn" : "esxi-2.vrack.vsphere.local", "esxiVersion" : "6.7.0-16075168", "hardwareVendor" : "VMware, Inc.", "cpu" : { "cpuCores" : [ { "model" : "intel", "frequencyMHz" : 2394.375, "manufacturer" : "Intel(R) Xeon(R) Platinum 8260 CPU @ 2.40GHz " }, { "frequencyMHz" : 2394.375, "manufacturer" : "Intel(R) Xeon(R) Platinum 8260 CPU @ 2.40GHz ", "model" : "intel" }, { "model" : "intel", "frequencyMHz" : 2394.375, "manufacturer" : "Intel(R) Xeon(R) Platinum 8260 CPU @ 2.40GHz " }, { "model" : "intel", "manufacturer" : "Intel(R) Xeon(R) Platinum 8260 CPU @ 2.40GHz ", "frequencyMHz" : 2394.375 }, { "model" : "intel", "manufacturer" : "Intel(R) Xeon(R) Platinum 8260 CPU @ 2.40GHz ", "frequencyMHz" : 2394.375 }, { "frequencyMHz" : 2394.375, "manufacturer" : "Intel(R) Xeon(R) Platinum 8260 CPU @ 2.40GHz ", "model" : "intel" }, { "frequencyMHz" : 2394.375, "manufacturer" : "Intel(R) Xeon(R) Platinum 8260 CPU @ 2.40GHz ", "model" : "intel" }, { "model" : "intel", "manufacturer" : "Intel(R) Xeon(R) Platinum 8260 CPU @ 2.40GHz ", "frequencyMHz" : 2394.375 } ], "frequencyMHz" : 19155, "usedFrequencyMHz" : 1892, "cores" : 8 }, "physicalNics" : [ { "deviceName" : "vmnic0", "macAddress" : "00:50:56:a1:cf:47" }, { "deviceName" : "vmnic1", "macAddress" : "00:50:56:a1:8b:71" } ], "bundleRepoDatastore" : "lcm-bundle-repo", "hybrid" : false, "memory" : { "totalCapacityMB" : 79995.421875, "usedCapacityMB" : 22571 }, "id" : "b318fe37-f9a8-48b6-8815-43aae5131b94", ...In this case, the id foresxi-2.vrack.vsphere.localisb318fe37-f9a8-48b6-8815-43aae5131b94.
- Open the/opt/vmware/vcf/lcm/lcm-app/conf/application-prod.propertiesfile.
- At the end of the file, add the following line:esx.upgrade.skip.host.ids=hostid1,hostid2Replace the host ids with the information from step 4. If you are including multiple host ids, do not add any spaces between them. For example:esx.upgrade.skip.host.ids=60927f26-8910-4dd3-8435-8bb7aef5f659,6c516864-b6de-4537-90e4-c0d711e5befb65c206aa-2561-420e-8c5c-e51b9843f93d
- Save and close the file.
- Ensure that the ownership of theapplication-prod.propertiesfile isvcf_lcm:vcf.
- Restart the LCM server by typing the following command in the console window:systemctl restart lcm
The hosts added to the
application-prod.properties
are not updated when you update the workload domain.
Upgrade ESXi with Custom ISOs
For clusters in workload domains with vSphere Lifecycle Manager baselines, you can upgrade ESXi with a custom ISO from your vendor. VMware Cloud Foundation 4.4.1.1 and later support multiple custom ISOs in a single ESXi upgrade in cases where specific clusters or workload domains require different custom ISOs.
Download the appropriate vendor-specific ISOs on a computer with internet access. If no vendor-specific ISO is available for the required version of ESXi, then you can create one. See Create a Custom ISO Image for ESXi.
- Download the VMware Software Update bundle for VMware ESXi. See Download Bundles Using SDDC Manager.To use an async patch version of ESXi, enable the patch with the Async Patch Tool before proceeding to the next step. See Async Patch Tool 1.2.
- Using SSH, log in to theSDDC Manager appliance.
- Create a directory for the vendor ISO(s) under the/nfs/vmware/vcf/nfs-mountdirectory. For example,/nfs/vmware/vcf/nfs-mount/esx-upgrade-partner-binaries.
- Copy the vendor-specific ISO(s) to the directory you created on theSDDC Manager appliance. For example, you can copy the ISO to the/nfs/vmware/vcf/nfs-mount/esx-upgrade-partner-binariesdirectory.
- Change permissions on the directory where you copied the ISO(s). For example,chmod -R 775 /nfs/vmware/vcf/nfs-mount/esx-upgrade-partner-binaries/
- Change owner to vcf.chown -R vcf_lcm:vcf /nfs/vmware/vcf/nfs-mount/esx-upgrade-partner-binaries/
- Create an ESX custom image JSON using the following template.
where{ "esxCustomImageSpecList": [{ "bundleId": "bundle ID of the ESXI bundle you downloaded", "targetEsxVersion": "ESXi version for the target VMware Cloud Foundation version", "useVcfBundle": false,"domainId": "xxxxxxxx-xxxx-xxxx-xxxxxxxxxxxx","clusterId": "xxxxxxxx-xxxx-xxxx-xxxxxxxxxxxx", "customIsoAbsolutePath": "Path_to_custom_ISO" }] }ParameterDescription and Example ValuebundleIdID of the ESXi upgrade bundle you downloaded. You can retrieve the bundle ID by navigating to the page and clickingView Detailsto view the bundle ID.For example,8c0de63d-b522-4db8-be6c-f1e0ab7ef554.If an incorrect bundle ID is provided, the upgrade will proceed with theVMware Cloud Foundationstock ISO and replace the custom VIBs in your environment with the stock VIBs.targetEsxVersionVersion of the ESXi bundle you downloaded. You can retrieve the target ESXi version by navigating to the page and clickingView Detailsto view the "Update to Version".useVcfBundleSpecifies whether theVMware Cloud FoundationESXi bundle is to be used for the upgrade.If you want to upgrade with a custom ISO image, ensure that this is set tofalse.domainId(optional, VCF 4.4.1.1 and later only)ID of the specific workload domain for the custom ISO. Use the VMware Cloud Foundation API (GET /v1/domains) to get the IDs for your workload domains.clusterId(optional, VCF 4.4.1.1 and later only)ID of the specific cluster within a workload domain to apply the custom ISO. If you do not specify aclusterId, the custom ISO will be applied to all clusters in the workload domain. Use the VMware Cloud Foundation API (GET /v1/clusters) to get the IDs for your clusters.customIsoAbsolutePathPath to the custom ISO file on theSDDC Manager appliance. For example,/nfs/vmware/vcf/nfs-mount/esx-upgrade-partner-binaries/VMware-VMvisor-Installer-7.0.0.update01-17325551.x86_64-DellEMC_Customized-A01.isoHere is an example of a completed JSON template.{ "esxCustomImageSpecList": [{ "bundleId": "8c0de63d-b522-4db8-be6c-f1e0ab7ef554", "targetEsxVersion": "6.7.0-10302608", "useVcfBundle": false, "customIsoAbsolutePath": "/nfs/vmware/vcf/nfs-mount/esx-upgrade-partner-binaries/VMware-VMvisor-Installer-7.0.0.update01-17325551.x86_64-DellEMC_Customized-A01.iso" }] }Here is an example of a completed JSON template with multiple ISOs using a single workload domain and specified clusters (VCF 4.4.1.1 and later only).{ "esxCustomImageSpecList": [ { "bundleId": "aa7b16b1-d719-44b7-9ced-51bb02ca84f4", "targetEsxVersion": "7.0.1-18150133", "useVcfBundle": false, "domainId": "1b7b16b1-d719-44b7-9ced-51bb02ca84b2", "clusterId": "c37b16b1-d719-44b7-9ced-51bb02ca84f4", "customIsoAbsolutePath": "/nfs/vmware/vcf/nfs-mount/esx-upgrade-partner-binaries/VMware-ESXi-7.0.2-17867351-DELL.zip" }, { "bundleId": "aa7b16b1-d719-44b7-9ced-51bb02ca84f4", "targetEsxVersion": "7.0.1-18150133", "useVcfBundle": false, "domainId": "1b7b16b1-d719-44b7-9ced-51bb02ca84b2", "customIsoAbsolutePath": "/nfs/vmware/vcf/nfs-mount/esx-upgrade-partner-binaries/VMware-ESXi-7.0.2-17867351-HP.zip" } ] } - Save the JSON file asesx-custom-image-upgrade-spec.jsonin the/nfs/vmware/vcf/nfs-mount.If the JSON file is not saved in the correct directory, the stockVMware Cloud FoundationISO is used for the upgrade and the custom VIBs are overwritten.
- Set the correct permissions on the/nfs/vmware/vcf/nfs-mount/esx-custom-image-upgrade-spec.jsonfile:chmod -R 775 /nfs/vmware/vcf/nfs-mount/esx-custom-image-upgrade-spec.jsonchown -R vcf_lcm:vcf /nfs/vmware/vcf/nfs-mount/esx-custom-image-upgrade-spec.json
- Open the/opt/vmware/vcf/lcm/lcm-app/conf/application-prod.propertiesfile.
- In thelcm.esx.upgrade.custom.image.spec=parameter, add the path to the JSON file.For example,lcm.esx.upgrade.custom.image.spec=/nfs/vmware/vcf/nfs-mount/esx-custom-image-upgrade-spec.json
- In the navigation pane, click .
- On the Workload Domains page, click the domain you are upgrading and then click theUpdates/Patchestab.
- Schedule the ESXi upgrade bundle.
- Monitor the upgrade progress. See Monitor VMware Cloud Foundation Updates.
- After the upgrade is complete, confirm the ESXi version by clickingCurrent Versions. The ESXi hosts table displays the current ESXi version.
Upgrade ESXi with
VMware Cloud Foundation Stock
ISO and Async Drivers
VMware Cloud Foundation
Stock
ISO and Async DriversFor clusters in workload domains with vLCM baselines, you can apply the stock ESXi
upgrade bundle with specified async drivers.
Download the appropriate async drivers for your hardware on a
computer with internet access.
- Download theVMware Cloud FoundationESXi upgrade bundle. See Download Bundles Using SDDC Manager.
- Using SSH, log in to theSDDC Manager appliance.
- Create a directory for the vendor provided async drivers under the/nfs/vmware/vcf/nfs-mountdirectory. For example,/nfs/vmware/vcf/nfs-mount/esx-upgrade-partner-drivers/drivers.
- Copy the async drivers to the directory you created on theSDDC Manager appliance. For example, you can copy the drivers to the/nfs/vmware/vcf/nfs-mount/esx-upgrade-partner-drivers/driversdirectory.
- Change permissions on the directory where you copied the drivers. For example,chmod -R 775 /nfs/vmware/vcf/nfs-mount/esx-upgrade-partner-drivers/drivers
- Change owner to vcf.chown -R vcf_lcm:vcf /nfs/vmware/vcf/nfs-mount/esx-upgrade-partner-drivers/drivers
- Create an ESX custom image JSON using the following template.
where{ "esxCustomImageSpecList": [{ "bundleId": "bundle ID of the ESXI bundle you downloaded", "targetEsxVersion": "ESXi version for the target VMware Cloud Foundation version", "useVcfBundle": true, "esxPatchesAbsolutePaths": ["Path_to_Drivers"] }] }ParameterDescription and Example ValuebundleIdID of the ESXi upgrade bundle you downloaded. You can retrieve the bundle ID by navigating to the page and clickingView Detailsto view the bundle ID.For example,8c0de63d-b522-4db8-be6c-f1e0ab7ef554.targetEsxVersionVersion of the ESXi upgrade bundle you downloaded. You can retrieve the ESXi target version by navigating to the page and clickingView Detailsto view the "Update to Version".useVcfBundleSpecifies whether the ESXi bundle is to be used for the upgrade. Set this totrue.esxPatchesAbsolutePathsPath to the async drivers on theSDDC Manager appliance. For example,/nfs/vmware/vcf/nfs-mount/esx-upgrade-partner-drivers/drivers/VMW-ESX-6.7.0-smartpqi-1.0.2.1038-offline_bundle-8984687.zipHere is an example of a completed JSON template.{ "esxCustomImageSpecList": [{ "bundleId": "411bea6a-b26c-4a15-9443-03f453c68752-apTool", "targetEsxVersion": "7.0.3-21053776", "useVcfBundle": true, "esxPatchesAbsolutePaths": ["/nfs/vmware/vcf/nfs-mount/esx-upgrade-partner-drivers/drivers/HPE-703.0.0.10.9.5.14-Aug2022-Synergy-Addon-depot.zip"] }] } - Save the JSON file asesx-custom-image-upgrade-spec.jsonin the/nfs/vmware/vcf/nfs-mount.If the JSON file is not saved in the correct directory, the stockVMware Cloud FoundationISO is used for the upgrade and the custom VIBs are overwritten.
- Set the correct permissions on the/nfs/vmware/vcf/nfs-mount/esx-custom-image-upgrade-spec.jsonfile:chmod -R 775 /nfs/vmware/vcf/nfs-mount/esx-custom-image-upgrade-spec.jsonchown -R vcf_lcm:vcf /nfs/vmware/vcf/nfs-mount/esx-custom-image-upgrade-spec.json
- Open the/opt/vmware/vcf/lcm/lcm-app/conf/application-prod.propertiesfile.
- In thelcm.esx.upgrade.custom.image.spec=parameter, add the path to the JSON file.For example,lcm.esx.upgrade.custom.image.spec=/nfs/vmware/vcf/nfs-mount/esx-custom-image-upgrade-spec.json
- In the navigation pane, click .
- On the Workload Domain page, click the management domain.
- On the Domain Summary page, click theUpdates/Patchestab.
- In the Available Updates section, clickUpdate NoworSchedule Updatenext to the VMware Software Update bundle for VMware ESXi.
- Monitor the upgrade progress. See Monitor VMware Cloud Foundation Updates.
- After the upgrade is complete, confirm the ESXi version by clickingCurrent Versions. The ESXi hosts table displays the current ESXi version.